 This summer, dear ones, I cam across this cute fabric - pale pink polka dots and dark chocolate birds on a creamy yellow background. I bought it without knowing what I could make of it - perhaps a cute summer top? I searched for the right top inspiration, but never found it. So, I folded the fabric away, still keeping an eye out for that perfect pattern to make a summer top (for that far away day when summer returns).
When baking bread the other day, I decided I needed a new apron. I was wearing a very cute, yet utilitarian apron from Anthropologie. I like the apron I have already, but it's just kind of... blah. It's an unbleached linen with orange embroidery and trim, cute, but fairly plain. And, to be honest, sometimes a girl just wants a little flounce when she's whipping up cupcakes for a birthday or hors d'oeuvres for a dinner party or, you know, re-heating leftovers.
one square = one inch
First, transfer the pattern. I pretty much always use pages from the Sunday New York Times when I make patterns - it's a great way to recycle - and for something I am going to make over and over and over again, it's fairly durable.
Using a ruler, make a grid pattern based on the above diagram.
Then transfer the pattern. It's really easy - that's what the grid is for! If you haven't done it before, just take a deep breath and go slow, one square at a time. This, by the way, is the most time consuming part of the whole project.
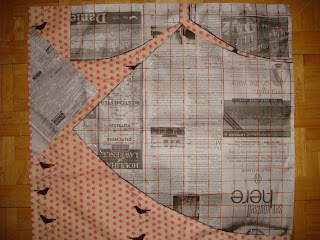
After you cut out your pattern, lay it on the fabric, something like this:
Make pleats according to the pattern - lining up circles and triangles - and baste along the top edge.
I decided to use this hot pink grosgrain around the edges. Measure about 5" up from the bottom and mark lightly with a pencil or a disappearing sewing pen and pin the ribbon (or whatever trim you decide to use) and top stitch.
Once you have the trim on, it time to pin and sew the waistband pieces. It should look something like this:
The original pattern called for a pocket, but I didn't love the way it looked when I pinned it on. It would be great to have a pocket on this cute apron, but I am really happy with the way it looks without!


You are so talented! This is adorable.
ReplyDelete